Tracking Codes Google Analytics: A 2026 Shopify Guide
You’re probably in the same spot most Shopify teams hit after the first serious push into paid acquisition.
Meta is spending. Google Ads is spending. Orders are coming in. But when you open analytics, the answers you need aren’t there in a form you can trust. One report says paid social drove the sale. Another says direct. Shopify shows revenue, but not enough context to decide which products should keep getting budget and which ones should get cut.
Tracking codes google analytics then stops being a setup task and becomes a profit problem.
If your tracking is loose, you won’t just have messy dashboards. You’ll make expensive decisions with bad inputs. You’ll keep funding products that attract cheap clicks but weak margin. You’ll underweight products that deserve cold traffic. And once data is missed, you usually don’t get another chance to recover it.
Why Your Ad Spend Demands Flawless Analytics Tracking
A common pattern in DTC looks like this.
A brand launches Meta catalog ads across a broad product set. Sales come in, but the team can’t clearly tell whether the lift came from prospecting, retargeting, branded search, email, or returning customers who would have bought anyway. They react by scaling what appears to be working. A week later, spend rises faster than profit.
That usually isn’t just a media buying issue. It’s an analytics issue first.
If Google Analytics tracking is installed badly, or installed in pieces by different apps, your reporting stops being a system of record. It becomes a rough estimate. For a Shopify operator, that creates three direct problems:
Budget goes to the wrong products because campaign performance is disconnected from product-level truth.
Retargeting gets noisy because add-to-cart and purchase events don’t line up cleanly.
ROAS looks better than profit when attribution is fuzzy and high-margin products aren’t separated from low-margin ones.

The fix starts with accepting one basic rule. Analytics doesn’t exist to make charts. It exists to help you decide what gets more spend, what gets less, and what should be excluded entirely.
That’s why teams that care about merchandising, paid social, and retention all end up caring about implementation detail. If your tracking isn’t clean, your dashboard won’t be clean either. And if you want a clearer reporting layer on top of your ad and store data, a solid data analytics dashboards workflow only works when the underlying event collection is reliable.
Practical rule: If you can’t trust product-level attribution, don’t trust campaign-level conclusions either.
Decoding GA4 Tracking Codes and the End of Universal Analytics
Google Analytics changed a lot over time, and that history matters because many Shopify stores still carry legacy decisions in their theme, apps, or tag setup.
Google’s analytics tracking began after the acquisition of Urchin Software Corp in April 2005, then moved through ga.js in 2007, analytics.js for Universal Analytics in 2013, and gtag.js in 2017. By May 2021, 55% of all websites used Google Analytics, and the July 1, 2024 sunset of Universal Analytics access made GA4 migration essential if brands wanted to avoid losing access to historical data they hadn’t exported, according to this history of Google Analytics tracking code.
What the tracking code does
The code’s job is simple. It loads in the browser and sends data to Google.
That data is made up of hits, or event payloads, generated when a page loads or when a user takes an action. In practical terms, that means your analytics only knows what happened after the code was loaded and fired correctly.
For e-commerce, that matters because every useful decision starts there:
Tracking element | What it tells you | Why a DTC team cares |
|---|---|---|
Page view | A product, collection, or content page was viewed | Helps map top-of-funnel product interest |
Event | A shopper clicked, viewed an item, added to cart, or purchased | Connects behavior to ad traffic and merchandising |
Parameters | Extra context like item ID, item name, price, or currency | Makes product-level analysis possible |
User and session context | Where the visit came from | Drives attribution and channel evaluation |
Why GA4 is the version that matters
Universal Analytics was built around sessions. GA4 is built around events.
That sounds technical, but the difference is practical. A session-based model is fine when you only care about visits and pageviews. A modern Shopify store needs to know what happened to a specific product, on a specific device, after a specific campaign click.
GA4 handles that better because the data model is centered on actions. That’s closer to how commerce works.
For a marketing manager, the useful shorthand is this:
UA asked: how many sessions happened?
GA4 asks: what actions happened, and with what context?
That makes GA4 better suited for product views, add-to-cart flows, checkout behavior, and purchase events.
Measurement IDs vs old UA IDs
If you’ve inherited an older store, you may still see an ID that starts with UA- somewhere in the theme or an app setting.
That’s old Universal Analytics. GA4 uses a Measurement ID that starts with G-. If you’re deploying current tracking, that G-based ID is what you’re using in gtag.js or through Google Tag Manager.
Leaving old UA code in place doesn’t make your setup safer. It usually makes it harder to diagnose duplication, conflicting tags, and reporting drift.
What not to do on a Shopify store
The most common bad setup is a layered mess:
Shopify app installs one Google tag
Theme code includes another
GTM sends a third
Legacy UA code still sits in the theme header
That setup creates false confidence because “data is coming in.” But the collection can still be wrong.
Use one intentional implementation path. Document it. Remove leftovers. If someone on the team can’t explain where the GA4 tag fires from, the setup isn’t stable enough for scaling ad spend.
Essential Installation Methods for Shopify Stores
There are three common ways to install Google Analytics on Shopify. All three can work. They’re not equal.
The right question isn’t “Which one is easiest today?” It’s “Which one will still be manageable when you add Meta Pixel, Conversions API logic, custom events, merchandising tests, and a second person touching the account?”
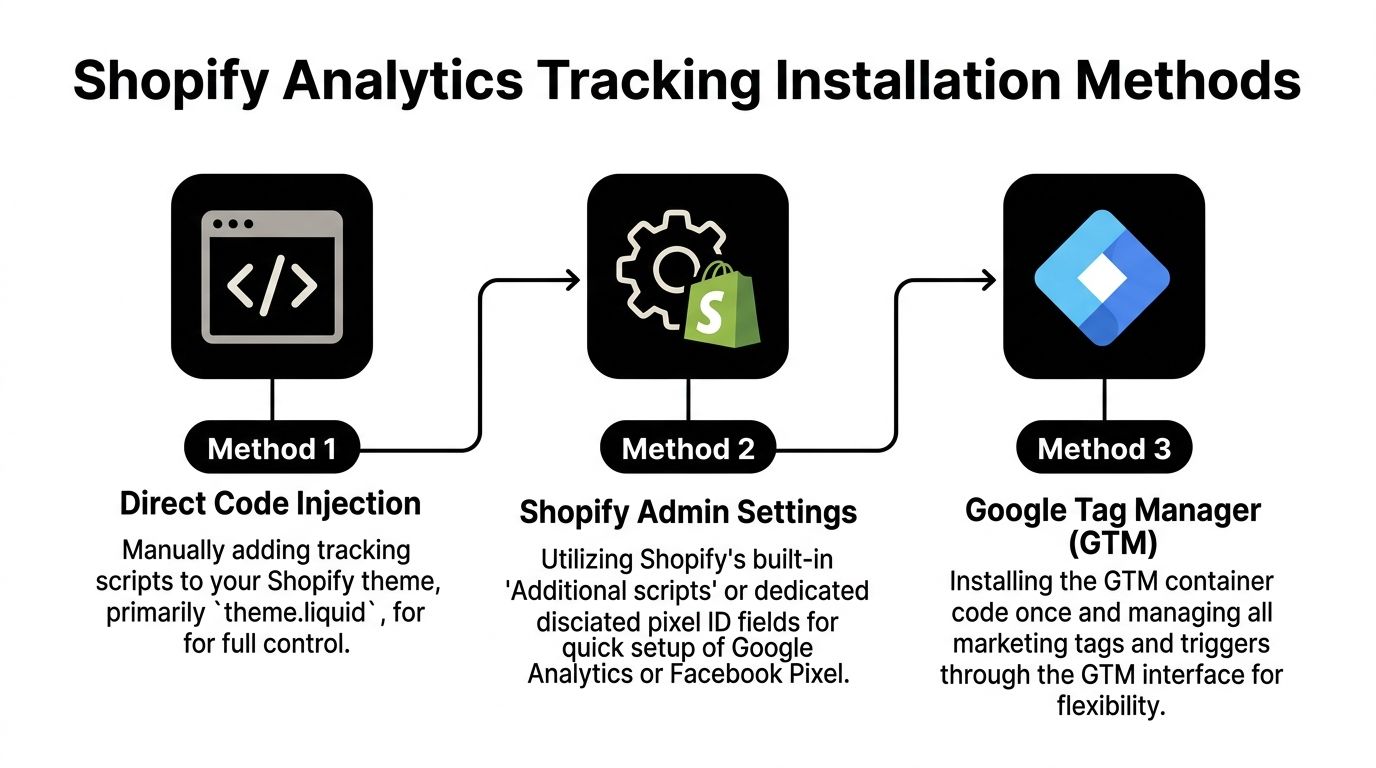
Shopify native integrations
This is usually the fastest path for a smaller team.
You connect Google through Shopify’s native app or admin-level integrations, follow the prompts, and data starts flowing. For a brand with a simple stack and limited customization needs, that can be enough.
The trade-off is control.
Native installs usually abstract the implementation details away from you. That feels convenient until you need to answer questions like:
Which event parameters are passed?
Can I modify event logic?
How do I stop duplicate firing if another app is also sending data?
How do I debug a mismatch between GA4 and Meta event collection?
If your store is small and your reporting needs are basic, native setup is acceptable. If you’re running serious paid social with SKU-level decisions, it often becomes restrictive.
Manual gtag.js insertion in the theme
This method means placing the Google tag directly into the theme, usually in a global file so it loads across the site.
The upside is clear. It’s direct, lightweight, and doesn’t require learning GTM first.
The downside is maintenance. Manual installs get messy quickly when multiple people work on the store or when new tracking needs show up. A direct code insert can also become fragile after theme edits, app conflicts, or store redesigns.
Here’s where manual installation often breaks down in real life:
A developer adds the base GA4 tag
The site records pageviews, so everyone assumes tracking is done.
Marketing needs event tracking
Now someone asks for add_to_cart, purchase, or SKU parameters.
Another tool gets installed
A plugin or app adds overlapping scripts.
No one knows the source of truth
Debugging turns into hunting through theme files, apps, and browser output.
That’s why direct insertion is better treated as a temporary option, not the operating model for a scaling brand.
Google Tag Manager for control and scale
For most serious Shopify setups, Google Tag Manager is the practical choice.
It gives you one container on the site, then lets you manage tags, triggers, and variables in one interface instead of repeatedly editing the theme. That’s useful for Google Analytics, but it becomes much more valuable once your stack includes Meta, ad platform tags, consent logic, and custom event handling.
According to PW Skills on tracking codes, deploying GA4 through GTM yields 98%+ implementation success rates for complex DTC setups, compared with 75% for manual gtag.js insertion. The same source notes 25% higher event match quality for Meta’s CAPI in Shopify contexts, while firing misconfigurations in manual setups can cause 20-30% data loss.
That doesn’t mean GTM is magical. It means structured implementations fail less often than scattered code edits.
A clean GTM setup on Shopify
A practical GTM process looks like this:
Install the container once
Place the GTM container snippet in the site so it loads globally.
After that, GTM becomes the delivery layer for your analytics tags. You don’t keep editing the theme every time tracking changes.
Add the GA4 configuration tag
Inside GTM:
choose the Google Analytics GA4 Configuration tag
enter your Measurement ID
trigger it on All Pages
That establishes the base tracking layer.
Turn on useful event collection carefully
GA4 enhanced measurement can help, but don’t assume auto-collected events are enough for e-commerce.
A Shopify store usually needs deliberate event design, especially for product and purchase data.
Verify before publishing
Use preview mode and GA4 realtime checks before pushing changes live.
This is also the right stage to review whether the store already has overlapping analytics code from an app or prior implementation.
GTM doesn’t replace strategy. It gives strategy a controlled place to live.
A simple decision framework
If you need a quick choice, use this:
Method | Best for | Main weakness |
|---|---|---|
Shopify native integration | Early-stage stores that want speed | Limited flexibility and visibility |
Manual gtag.js | Temporary direct installs with technical oversight | Harder maintenance and higher risk of duplication |
Google Tag Manager | Brands that need control, testing, and scale | Requires setup discipline |
For teams also working on server-side event quality and ad platform signal reliability, this is usually where analytics setup meets broader tracking architecture. If that’s part of your stack, this guide on Meta Conversions API is the adjacent piece to get right alongside GA4.
There’s also one practical mention worth making here. Tools like SpendOwlAI sit downstream from this work. They rely on clean Shopify and Meta-connected product data to support product set decisions, custom labeling, and campaign rotation logic. If the underlying analytics and event collection are loose, those downstream decisions get weaker too.
Implementing Advanced Ecommerce and SKU-Level Event Tracking
Basic pageviews don’t tell you enough to run a DTC account well.
You need to know which product was viewed, which one was added to cart, which SKU sold, and what that meant for your merchandising and ad allocation. Without that detail, you can only optimize at the campaign level. That’s too blunt for a Shopify catalog.
A hard rule applies here. Google Analytics can’t collect the past after the fact. Data only starts once the tracking code executes in the browser, so any delay in proper implementation creates a permanent blind spot for product analysis and tiering, as explained in this review of whether Google Analytics can track past data.

The events that matter first
For most Shopify stores, the core GA4 e-commerce events to prioritize are:
view_item when a shopper lands on a product page
add_to_cart when they add a product
begin_checkout when checkout starts
purchase when the order is completed
The event names matter, but the parameters matter more.
A purchase event without item detail only tells you that revenue happened. A purchase event with item-level data tells you which products deserve budget, which bundles are working, and which items are driving top-line revenue but weak unit economics.
What SKU-level payloads should include
For product-focused analysis, pass item data consistently.
A practical event payload should carry fields like these:
Parameter type | Why it matters |
|---|---|
Item ID or SKU | Ties analytics back to catalog and merchandising decisions |
Item name | Makes reports readable for marketers |
Price | Supports revenue interpretation by item |
Currency | Prevents reporting ambiguity |
Quantity | Distinguishes single-unit from multi-unit orders |
If your naming and IDs don’t line up with Shopify product data, reporting becomes much harder to use. The team sees orders, but not clearly enough to decide which SKU should stay in prospecting, which should move into retargeting focus, and which should be cut.
Example event structure
A simple conceptual pattern looks like this:
And a purchase event follows the same logic, but with the completed order context and line items.
The exact implementation can happen through GTM variables, data layer pushes, or Shopify-side event structures. The point is consistency.
What works and what fails
The setups that work share a few traits:
Product identifiers match real catalog logic
Event names are standard and predictable
Each event carries the item context needed for reporting
The same product isn’t labeled one way in GA and another in ads
The setups that fail usually have one of these problems:
Only pageviews are tracked
You know traffic happened, but not commercial intent.
Events fire without item parameters
You can see add_to_cart, but not which SKU drove it.
Purchase tracking is isolated from product detail
Revenue appears, but product-level profitability analysis stays weak.
Theme, app, and GTM logic conflict
Events duplicate or disappear.
If you can’t answer “Which exact SKU earned this budget?” your event model still isn’t finished.
Why this changes ad decisions
This is the part many teams miss.
Advanced e-commerce tracking isn’t only for GA4 reporting. It directly improves how you manage catalog advertising. Once SKU-level data is clean, you can separate products into practical action groups:
keep proven products in broad acquisition
move high-interest, low-conversion products into more controlled testing
exclude products that burn spend without purchases
build cross-sell logic around what people buy together
That’s how tracking codes google analytics turns into a merchandising and media tool, not just a reporting tool.
How to Verify and Debug Your Tracking Setup
Most broken analytics setups don’t look broken at first.
A pageview appears in GA4. One purchase comes through. The team assumes tracking is fine. Then a week later, revenue doesn’t reconcile, campaign traffic looks distorted, and nobody knows whether the issue is Meta, Shopify, or Google Analytics.
Verification has to happen before you trust the reports.

Start with realtime checks
Open your store in a fresh browser session and trigger a few known actions.
Visit a product page. Add an item to cart. If possible, run a controlled test through checkout in your normal QA process. Then open GA4 realtime reporting and confirm the events appear with the expected names.
This check won’t validate every parameter, but it answers the first question fast: is data arriving at all?
Use GTM preview and Tag Assistant
If you’re running through Google Tag Manager, preview mode is the fastest way to catch firing problems.
Look for:
Which tags fired on page load
Which tags did not fire
What trigger condition was met
Whether event parameters were available when the tag executed
Most implementation errors become obvious here. A tag might be configured correctly but fire before the product data exists. Or the trigger may be too broad and send duplicate events.
A clean preview session is worth more than a week of guessing from reports.
A useful walkthrough sits below if you want a visual reference while debugging.
Check the order of attribution signals
One area that creates confusion is UTM processing when Google Ads auto-tagging is active.
A key issue noted in guidance on this topic is that Analytics checks for a gclid first and then manual UTMs. In hybrid setups, that can create 20-30% attribution leakage if the tagging logic isn’t understood, according to this discussion of UTM processing order.
That matters during debugging because a tracking setup can appear technically healthy while attribution is still wrong.
If you’re testing campaign links, verify these questions:
Is a gclid present?
Are manual UTMs also attached?
Is the final landing URL preserving the parameters?
Is the resulting source/medium what you expected in GA4?
Use browser developer tools when needed
For more stubborn issues, inspect network requests in the browser.
You’re looking for confirmation that the page sends analytics requests after the relevant action. This is especially helpful when:
events appear in GTM preview but not in GA4
purchase events fire inconsistently
consent logic blocks some events
app scripts interfere with your tags
A practical debug sequence looks like this:
Trigger the action
View item, add to cart, or purchase in a test flow.
Watch the network activity
Confirm the browser sends the analytics request.
Compare with GTM preview
If GTM says a tag fired but no request is sent, inspect the tag config and consent conditions.
Compare with GA4
If the request exists but GA4 doesn’t show it, check property configuration and parameter formatting.
What to audit regularly
Even after launch, recheck the basics whenever the store changes.
Theme updates can alter page structure and break triggers.
New apps can inject duplicate scripts.
Campaign changes can expose UTM issues.
Checkout or consent changes can affect event firing.
Good debugging isn’t a one-time cleanup. It’s operating discipline.
Best Practices for Campaign Attribution and Measurement
Attribution gets cleaner when your team treats UTM tagging like infrastructure, not admin work.
Most reporting problems blamed on GA4 are process problems. One person uses PaidSocial, another uses paidsocial, a third skips campaign content entirely, and Google Analytics records them as separate realities. The platform can only organize what you send it.
The core UTM framework is straightforward. The five parameters are source, medium, campaign, term, and content. A disciplined governance process, such as a shared spreadsheet, helps prevent inconsistent casing like Email versus email, which GA4 treats as distinct values and can create 5-10% data fragmentation. Using all five parameters for detailed segmentation can produce 2-3x better ROAS visibility, according to Christopher Penn’s guidance on Google Analytics UTM tracking codes.
The minimum standard for a DTC team
If your team runs Meta, email, influencer, affiliate, or Google campaigns, build one shared naming system and make it mandatory.
A practical baseline looks like this:
UTM parameter | What it should answer | Example pattern |
|---|---|---|
utm_source | Who sent the traffic | meta, google, klaviyo, creatorname |
utm_medium | What channel type it was | paid_social, cpc, email, affiliate |
utm_campaign | Which initiative drove the click | spring_launch, hero_bundle_test |
utm_term | Which audience, keyword, or angle | retargeting_7d, vitamin_c |
utm_content | Which creative or placement variation | video_a, carousel_2, headline_b |
The point isn’t elegance. The point is repeatability.
What disciplined attribution looks like in practice
A good workflow is boring on purpose.
One spreadsheet or builder controls approved UTM values.
Lowercase only is enforced across the team.
Naming rules are documented before campaigns launch.
Creative variants get content-level tags so ad testing doesn’t disappear into one campaign label.
Audience or product-set logic goes into term or content so campaign reports stay usable.
If you need a starting framework, this guide to UTM for Google Analytics is a practical companion to GA4 setup work.
Campaign attribution improves when naming conventions are decided before launch, not cleaned up after spend has already happened.
Where Shopify and Meta teams usually go wrong
The recurring mistakes are predictable.
Inconsistent naming
This is the quietest reporting problem and one of the most damaging. A small casing difference or spacing change fragments your acquisition data.
Overly broad campaign labels
If every paid social click uses the same campaign name, you lose the ability to separate prospecting from retargeting, hero products from launch products, or static creative from video.
Ignoring content and term
A lot of teams stop at source and medium. That’s enough for channel grouping, but not enough for ad decision-making.
Letting auto-tagging and manual tagging conflict
If Google Ads auto-tagging is active, you need to know how it interacts with your manual tags. Otherwise, your source attribution can drift from what the media buyer intended.
A practical tagging standard by channel
Here’s a simple operating pattern many DTC teams can use:
Meta ads
source =
metamedium =
paid_socialcampaign = campaign objective or product-set theme
term = audience or funnel stage
content = ad creative variant
Email
source =
klaviyoor your email platformmedium =
emailcampaign = flow or campaign name
term = segment
content = message variation
Influencer or creator links
source = creator identifier
medium =
influenceroraffiliatecampaign = launch or promotion
content = placement or deliverable type
Business Payoff
Tracking codes google analytics then becomes useful beyond reporting hygiene.
When attribution is stable, a Shopify team can finally answer questions that affect margin:
Which products deserve cold traffic?
Which campaigns only look efficient because attribution is inflated?
Which creatives drive intent but not purchases?
Which traffic sources produce buyers who reorder?
Which products should be excluded from paid spend even if they attract clicks?
That’s the shift from revenue reporting to decision reporting.
Good analytics won’t make a weak offer strong. But it will stop you from scaling the wrong story.
SpendOwlAI helps Shopify brands turn product-level performance signals into automated Meta catalog decisions. It connects Shopify and Meta Commerce Manager, applies performance-based product tagging, and supports product set management around what to show, to whom, and when to rotate it. If your GA4 and event tracking foundation is already clean, you can see how it fits into a broader profit-focused workflow at SpendOwlAI.