Your Complete Guide to the IG Stories Format in 2026
The magic numbers for a perfect Instagram Story are 1080x1920 pixels, which fits the native 9:16 aspect ratio of most smartphone screens. Sticking to this full-screen, vertical layout is the secret to making your content look polished and professional, avoiding any weird cropping or ugly black bars on the sides.
Why Mastering The IG Stories Format Matters

Think of the Instagram Stories format less like a set of rules and more like the blueprint for grabbing someone's attention. People fly through Stories, tapping from one to the next in a split second. Your first impression is everything.
Nailing the technical specs is the first—and most critical—step to creating content that actually stops the scroll and doesn't look like it was thrown together. This guide is your no-fluff reference, built for creators and marketers who just need the right specs, right now. Let’s get straight into it.
The Power of The Story Format
Since its debut in 2016, Instagram Stories has absolutely exploded. It’s now a primary channel for brands and creators, with a staggering 500 million people watching them every single day. In fact, 42% of users say they prefer consuming content through Stories over any other format.
For marketers, the numbers are even more compelling. An impressive 67% of users actually click on Story links, which is huge for driving traffic and making sales. If you want to dive deeper into these kinds of trends, The Social Shepherd is a great resource.
Getting the format right is the difference between a Story that feels native and immersive versus one that looks like an out-of-place afterthought. The 9:16 aspect ratio isn't just a recommendation; it's the standard for the entire vertical video world.
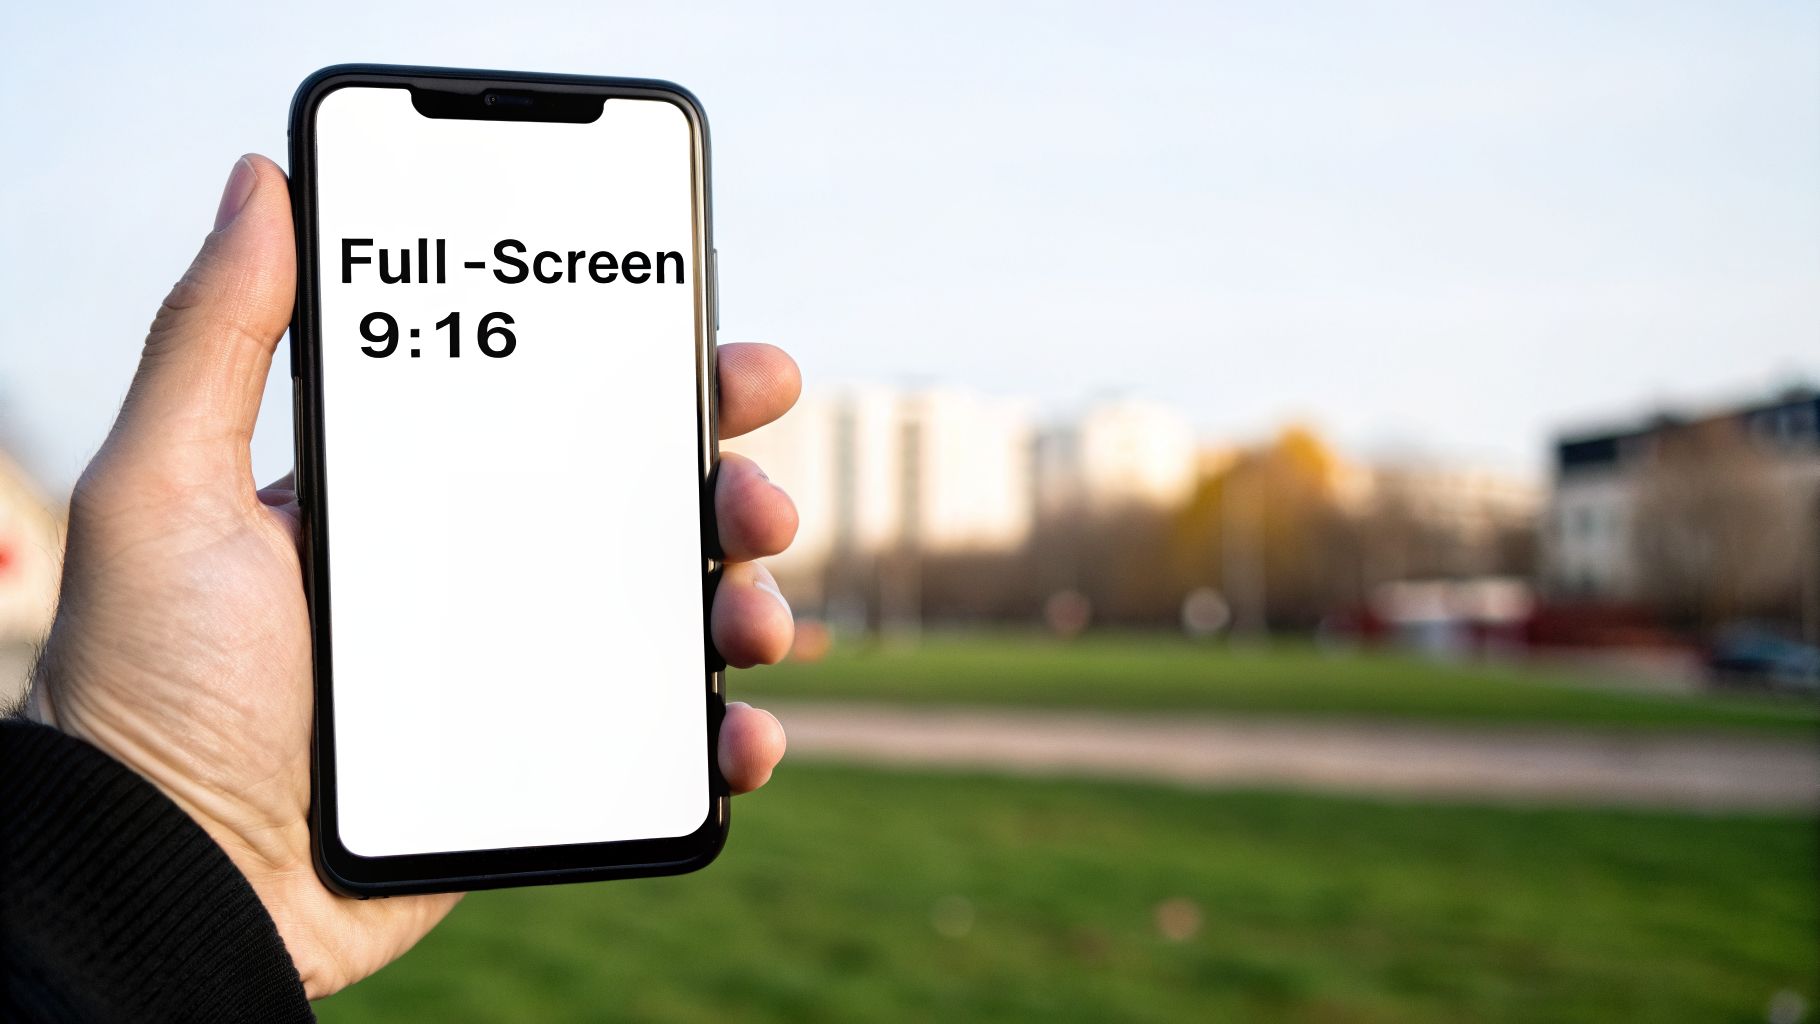
This screen capture from Instagram's own help center shows exactly why the vertical layout is so crucial for the best viewing experience.
As you can see, full-screen vertical content completely takes over the user's view, creating a seamless visual that holds their focus. When you ignore these core specs, you run headfirst into common—and totally avoidable—problems.
Blurry or Pixelated Content: If you upload a low-resolution image or video, Instagram’s compression algorithm has to stretch it to fit, which destroys the quality.
Awkward Cropping: Using the wrong aspect ratio forces Instagram to automatically crop your creative. Suddenly, your logo, key text, or even your subject’s head is cut off.
Reduced Engagement: A poorly formatted Story just looks unprofessional. It’s an instant signal for users to tap away, which tanks your engagement and hurts your ad performance.
By following the correct IG stories format from the very beginning, you’re setting up all your creative work for success.
Why the 9:16 Aspect Ratio Is a Big Deal
We can talk about pixel counts like 1080x1920 all day, but the real secret sauce to great Instagram Stories is the 9:16 aspect ratio. This isn’t just a random technical spec; it's the very foundation of what makes the Stories format so immersive and effective.
Think about watching a movie in a theater. That massive widescreen is built to pull you in and block out everything else. The 9:16 ratio does the same thing, but for the device we all hold vertically every day: our smartphones.
When your content is built for 9:16, it fills every last pixel of the screen. No gaps, no borders, no distractions. It creates a seamless, full-screen canvas that makes your brand look like it truly belongs on the platform. It's the difference between an ad that feels native and one that sticks out like a sore thumb.
How the Wrong Ratio Kills the Vibe
Ever seen a Story with those clunky, colored bars at the top and bottom? That’s what happens when you upload something that isn't 9:16, like a standard 16:9 YouTube video or a 1:1 square image. Instagram has to fill the empty space somehow, and those filler bars are its clumsy solution.
The moment a viewer sees those bars, the illusion is broken. It’s a dead giveaway that the content wasn't made for Stories, which can make a brand look amateurish and often earns a quick "skip" to the next person's content.
The goal is to make people forget they're watching an ad. A perfect 9:16 aspect ratio is your best weapon for this. It removes all the visual friction and lets your message shine.
Getting the dimensions right is half the battle. To keep that seamless experience, you also have to pick the right file type. The wrong one can sabotage all your hard work, causing quality issues even if your ratio is perfect.
Choosing the Right File Type
For Instagram Stories, you really only need to worry about two main file types, each with a specific job.
MP4 for Video: This is the gold standard. When you pair an MP4 file with the H.264 codec (which is what most video editors do by default), you get an amazing balance of crisp visual quality and a small file size. Your videos will look great without taking ages to load, even for people on a spotty connection.
PNG for Static Images: While JPEGs get the job done, PNGs are usually the better call for graphics that have text, logos, or sharp lines. They handle solid colors and transparency much more cleanly, which helps you avoid those fuzzy, compressed-looking edges you sometimes see on JPEGs.
At the end of the day, getting the IG Stories format right starts with embracing the 9:16 screen. When you combine that non-negotiable aspect ratio with the right file types, you’re setting your creative up for success—full-screen, professional, and ready to grab attention.
Staying Inside the Lines: Designing for the Instagram Story Safe Zone
You can have the most brilliant creative in the world, but if Instagram’s own interface covers up your key message or call-to-action, it’s all for nothing. This is where mastering the “safe zone” isn't just a best practice—it's essential.
Think of your 1080x1920 canvas as a picture frame. The full space is there, but the most important stuff needs to be kept away from the edges where the frame itself sits. On Instagram, that "frame" is the user interface: your profile icon and username at the top, and the message bar or interactive buttons at the bottom. Drop your logo or headline in these spots, and poof—it's gone.
This isn’t some minor design nitpick. A hidden "Shop Now" button can't be clicked. An obscured headline can't be read. For anyone running ads, where every pixel is tied to performance, ignoring these zones is the fastest way to waste your budget.
The No-Go Areas to Avoid
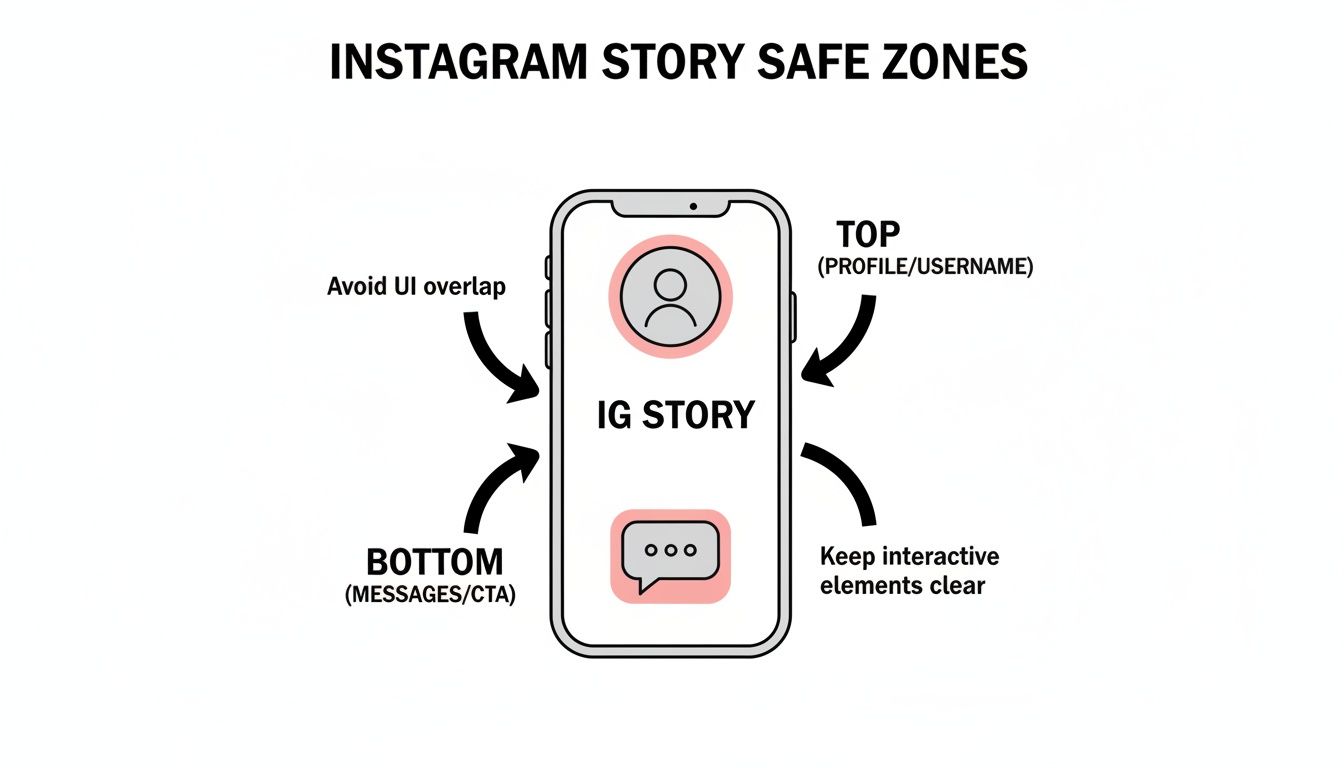
So, where are these danger zones? As a solid rule of thumb, keep all your critical elements out of the top and bottom 250 pixels of your Story. This leaves you with a generous central "safe area" where everything is guaranteed to be seen without any pesky UI getting in the way.
The team over at Later put together a great visual that shows exactly where these UI elements live.
Those highlighted areas are the buffer zones you absolutely have to respect.
Making sure your call-to-action is planted firmly in that central green zone means it’s not only visible but also easy to tap. It's a small tweak that can make a huge difference, especially when you also learn how to improve click-through rate with your copy and design choices.
Why Safe Zones Lead to Better Performance
Sticking to the safe zones isn't just about damage control; it's a proactive strategy for boosting engagement. When your audience can actually see and interact with your content as intended, they're far more likely to do what you want them to.
Clarity is King: Your core message and value proposition are front and center, not hidden behind a profile picture.
Higher Click-Throughs: CTAs and link stickers are fully visible and tappable, which is a direct line to more traffic and conversions.
A Polished Look: A clean, well-composed Story feels professional and native to the platform, which helps build trust.
When you respect the safe zones, you're telling your audience you get the platform. It creates a smooth experience that feels organic, not like a clunky ad that was shoehorned into the wrong place.
This little bit of polish is more important than ever. Globally, Instagram is still a powerhouse, with 27.5% of adults 18+ on the platform and a user base that grew 2.0% year-over-year. You can dig into more stats on user growth over at Metricool's blog. For performance marketers and e-commerce brands, getting the Story format right is a direct path to turning messy data into clear, confident decisions that save money. By optimizing for the real-world viewing experience, you get the absolute most out of every impression.
Getting Your Export Settings Just Right
You've nailed the dimensions and respected the safe zones—you're 90% of the way to a perfect Instagram Story. But that last 10%, the export, is where all your hard work gets locked in. This is the final quality check that ensures your creative looks as stunning on Instagram as it did in your editor.
Think of it like developing film in a darkroom. Your design is the negative, full of potential. The export process is what develops that negative into a beautiful, sharp print. If you rush this step, all that brilliant design work can get ruined by ugly compression artifacts, blurry video, or colors that just feel off.
This section will walk you through the exact, no-guesswork export settings for the most popular creative tools. These are steps you can build right into your workflow to make sure every single Story you publish is technically flawless.
First, let's revisit why those safe zones are so important. This visual breaks down exactly where Instagram's UI elements—like the profile icon and messaging bar—will cover your content.
Keeping your key messages and calls-to-action out of these top and bottom areas is non-negotiable. It guarantees they’ll be fully visible and tappable on any device.
Adobe Premiere Pro for Crisp Video
If you're editing video in Adobe Premiere Pro, your main goal is to beat Instagram's aggressive compression algorithm. Give it a high-quality file, and it will have less work to do, which means your video stays looking sharp.
Before you even start, make sure your sequence settings are already 1080x1920 at 30 FPS. When you're ready to export, follow these steps to the letter:
Head to File > Export > Media.
Set the Format to H.264. It's the gold standard for web video for a reason.
Under the Video tab, click Match Source, but then double-check that the dimensions are still 1080x1920.
Scroll down to Bitrate Settings and change Bitrate Encoding to VBR, 1 Pass.
Set your Target Bitrate to 10 Mbps. This is the sweet spot—high enough for excellent quality but low enough to keep your file size reasonable.
Pro Tip: Don't forget to check the "Use Maximum Render Quality" box at the very bottom. It takes a tiny bit longer to export, but it makes a noticeable difference in the sharpness of your final MP4, especially if you have graphics or text overlays.
Photoshop for Flawless Static Images
For static Stories made in Adobe Photoshop, the biggest villains are incorrect color profiles and bad compression. Get these wrong, and your vibrant design will look dull and washed out on a phone screen.
Always, always work in an sRGB color space—it's the standard for web and mobile displays. When you're ready to save, skip the old "Save As" command and use the Export As feature instead. It gives you far more control.
Go to File > Export > Export As.
Choose PNG as your format. For graphics with text, logos, and solid colors, PNG is much cleaner than JPEG.
Make sure both "Convert to sRGB" and "Embed Color Profile" are checked. This is the secret to consistent, accurate color.
Confirm the image size is 1080x1920 and hit export.
Canva for Quick and Compliant Creatives
Canva has become an absolute powerhouse for marketers who need to create great-looking content fast. The best part? Its templates are already built to the correct Instagram Story format, so half the battle is already won.
When you start a new design, you’re greeted with a library of perfectly sized templates. This means you're building on a compliant canvas from the very first click, taking all the guesswork out of the setup.
Once your design is ready, just click Share > Download.
For video Stories, choose MP4 Video. For static images, go with PNG to get the best quality. Canva takes care of all the tricky back-end settings like codecs and color profiles for you, making it one of the most efficient ways to create technically perfect Stories.
Organic Stories vs. Meta Story Ads
At first glance, organic Stories and paid Meta Story Ads look identical. They both take over the entire screen, use that classic vertical format, and disappear after 24 hours (unless you save them). But that's where the similarities end.
Think of it like this: your organic Stories are the day-to-day conversations you have with your loyal followers. It's where you can be a bit more casual, show behind-the-scenes content, and build a real community. Story Ads, on the other hand, are your direct pitch. They're built for a specific purpose—to grab the attention of a new, targeted audience and get them to take action.
Mixing up the strategy for these two can be a costly mistake. What works for your warm audience might fall completely flat with a cold one, and vice versa.
How They Really Differ
The most immediate difference you'll run into is time. When you upload an organic Story, you can post a single video clip up to 60 seconds long. That's plenty of time to tell a short story, run a quick tutorial, or share a detailed update with your community.
Paid Story Ads play by a different set of rules. The sweet spot for a single video ad is just 15 seconds. Sure, you can run longer ads, but Instagram will automatically chop them into multiple "cards" that people have to tap through. Let’s be honest, most won't. This time crunch forces you to be ruthless with your message—get to the point fast or you'll get skipped.
This example from Instagram's own advertising guide shows how a good Story Ad feels native but is laser-focused on a business goal.
See how it seamlessly blends into the Stories feed but includes that hard-to-miss "Shop Now" button? That's the key: it turns a passive scroll into a chance to make a sale.
Calls-to-action (CTAs) are another huge differentiator. Organic Stories give you fun, interactive stickers like polls, quizzes, and the all-important link sticker. Paid ads, however, unlock powerful, business-focused CTAs like "Shop Now," "Learn More," and "Sign Up" that tie directly into Meta's advertising ecosystem. Knowing how to use these effectively is a game-changer. For a deeper dive, check out our guide on how to scale Facebook ads, which covers how to align your ad goals with your creative.
Why You Can't Ignore Story Ads
The numbers don't lie. Story Ads have become a financial powerhouse for Meta. In 2022 alone, this single format pulled in a staggering $15.95 billion worldwide, making up over 25% of Instagram's total ad revenue.
Even more telling is how users react. A whopping 62% of people say they become more interested in a brand after seeing it in a Story. It’s no wonder this placement is still one of the fastest-growing and most effective ad spots out there.
Organic Stories vs. Meta Story Ads Key Differences
To make it crystal clear, here’s a side-by-side comparison of the two formats. This table breaks down everything from technical specs to strategic purpose.
Feature | Organic Stories | Meta Story Ads |
|---|---|---|
Primary Goal | Community building, engagement, brand personality | Lead generation, sales, traffic, direct conversions |
Audience | Existing followers, people who visit your profile | Highly targeted new audiences based on demographics, interests, and behaviors |
Video Length | Up to 60 seconds per single video segment | 15 seconds recommended for a single video card; longer ads are split |
Calls-to-Action | Interactive stickers (polls, quizzes, Q&A, link sticker) | Business-oriented CTA buttons ("Shop Now," "Learn More," "Sign Up") |
Content Style | Often spontaneous, authentic, behind-the-scenes, less polished | Usually more polished, direct, with a clear value proposition and strong hook |
Performance | Measured in views, replies, sticker taps, and reach | Measured in conversions, clicks, cost-per-result (CPR), and return on ad spend (ROAS) |
Lifespan | Disappears after 24 hours (unless added to Highlights) | Runs for the duration of the ad campaign as set in Meta Ads Manager |
Ultimately, you need a two-pronged approach. Don't just copy and paste your organic content into an ad campaign. An unpolished, authentic chat that your followers love probably won't have the punch needed to convert a total stranger.
Instead, create content specifically for each channel. Use organic Stories to nurture your community with longer, more personal content. For your paid ads, craft concise, high-impact visuals with direct calls-to-action that are built to sell. Mastering both is how you truly win on Instagram.
Troubleshooting Common Story Format Problems
Ever spend hours crafting the perfect Story, only to see it turn into a blurry, cropped, or discolored mess the second you upload it? It's a maddeningly common problem. Even when you think you've followed all the rules, technical gremlins can sneak in and wreck your hard work.
Let’s get one thing straight: most of these issues aren’t your fault. They happen because of Instagram's aggressive compression algorithm. Think of it like a bouncer at a club with a very strict dress code. If your file isn't dressed exactly right, the bouncer (the algorithm) will rough it up to make it fit, and quality is always the first casualty.
Your goal is to hand Instagram a file that’s so close to its preferred format that its algorithm barely has to touch it. That’s the secret to keeping your quality intact.
Why Is My Video Blurry or Pixelated?
Blurry video is the number one complaint I hear, and it almost always boils down to two things: a low bitrate or a bad file transfer.
First, bitrate. A low bitrate means your video file simply doesn't contain enough data to create a sharp, detailed image. So when Instagram squeezes it even smaller, it turns into a pixelated soup.
The second culprit is how you get the video to your phone. If you send the final file through an app like WhatsApp, Facebook Messenger, or even text message, you're killing your quality. These apps have their own compression systems that will undo all your careful export settings before you even get to Instagram.
Here’s how to fix it:
Pump Up the Bitrate: When you export from your video editor, aim for a target bitrate of at least 10 Mbps. This gives Instagram a high-quality source file to work with, minimizing its own compression damage.
Use a Lossless Transfer: You need a direct line from your computer to your phone. For Apple users, AirDrop is your best friend. For Android or cross-platform, a simple USB cable transfer or a cloud service like Google Drive or Dropbox will do the trick perfectly.
Fixing Weird Cropping and Wonky Colors
Seeing your beautifully framed shot unexpectedly zoomed in and cropped is another classic headache. This is almost always an aspect ratio problem. Instagram is ruthless about its 1080x1920 dimensions. If your file is even a few pixels off, the app will automatically crop it to fit, often cutting off vital parts of your design. Always, always double-check your project settings to make sure you're working in a true 9:16 canvas.
And what about when your vibrant brand colors look dull or washed out? That’s a color profile issue. Your phone screen, like most screens, is built to display colors in the sRGB color space. If you accidentally export from a tool like Adobe Photoshop using a print profile (like CMYK) or a wider gamut profile, the colors just won't look right on a phone. Make sure your export settings are always set to "Convert to sRGB."
The Instagram Stories format is a beast when it comes to audience retention. Even as other trends come and go, Stories have stayed remarkably consistent, with weekly posting frequency dropping only 3% year-over-year. That stability is fueled by the raw, in-the-moment feel that keeps 500 million daily users tapping through. You can dig into more stats about user behavior on Metricool. When you solve these technical snags, you're making sure your content can truly connect with that massive, engaged audience.
A Few Common Questions About Story Formats
Even with the perfect blueprint, some questions always seem to pop up. Let's run through the most common headaches and curiosities I see when it comes to Instagram Story formats. Think of this as your quick-reference guide to solving problems fast and getting back to the fun part—creating.
What’s the Absolute Best Video Format for Instagram Stories?
If you want the no-fuss, works-every-time answer, it's this: an MP4 file with the H.264 codec and AAC audio. This setup is the gold standard because it hits the sweet spot between crisp video quality and a file size that won’t take forever to upload. It just works.
To really nail it, make sure your frame rate is 30 FPS. And when you're exporting, aim for a video bitrate of at least 5-10 Mbps. This gives your video a bit of a "quality buffer" to survive Instagram's compression process and still look sharp on the other side.
Why Does My Instagram Story Look So Blurry?
Ah, the dreaded blurriness. I see this all the time, and it almost always comes down to one of three things. The first is starting too small—if your original file isn't 1080x1920 pixels, it’s going to get stretched and look fuzzy. Second, you might have crushed the quality during export, which is why that higher bitrate is so important.
The third culprit is a sneaky one: how you get the file to your phone. If you send your finished video through an app like WhatsApp or Facebook Messenger, they’ll compress it again and wreck all your hard work.
Pro Tip: To keep your video looking pristine, you have to transfer it directly. Use AirDrop if you’re on Apple devices or just plug your phone in with a USB cable. It’s the only way to guarantee the file arrives on your phone exactly as you exported it.
Can I Post a Horizontal Video to My Story?
You can, but you really, really shouldn't. When you upload a horizontal (16:9) video, Instagram shoehorns it into the vertical (9:16) player by slapping huge, ugly bars above and below it.
It completely shatters the immersive, full-screen feel that makes Stories so effective. It looks amateur, feels jarring, and basically tells your audience, "This wasn't made for you." That’s a fast track to getting skipped. Always think vertical-first. Knowing how to properly track your campaigns with UTM parameters can also help you measure the impact of well-formatted content, and you can learn more in our detailed guide to UTMs for Google Analytics.
What's the Maximum Length for an Instagram Story?
For a regular, organic Story, you can now post a single video clip that's up to 60 seconds long. If you upload something longer, Instagram will automatically chop it up into 60-second chunks for you.
But for paid Meta Story Ads, the game is different. The sweet spot is 15 seconds. That’s the recommended max length to grab someone's attention before they reflexively tap to the next Story.
At SpendOwlAI, we help you get past the technical weeds and focus on what’s actually driving performance. Our system sifts through your ad data and gives you a simple, prioritized list of what to do next. Optimize your budget, your creative, and your audiences with total clarity. Start your free 7-day trial and find out what really deserves your attention.