How to Start with Facebook Ads in 2026
Before you even think about crafting that perfect ad, you need to lay the proper groundwork. It's a common rookie mistake to jump straight into Ads Manager, but without the right setup, you're essentially flying blind. Getting your technical foundation solid from day one is the only way to know what's actually working and avoid burning through your budget.
Setting Up Your Ad Account for Success
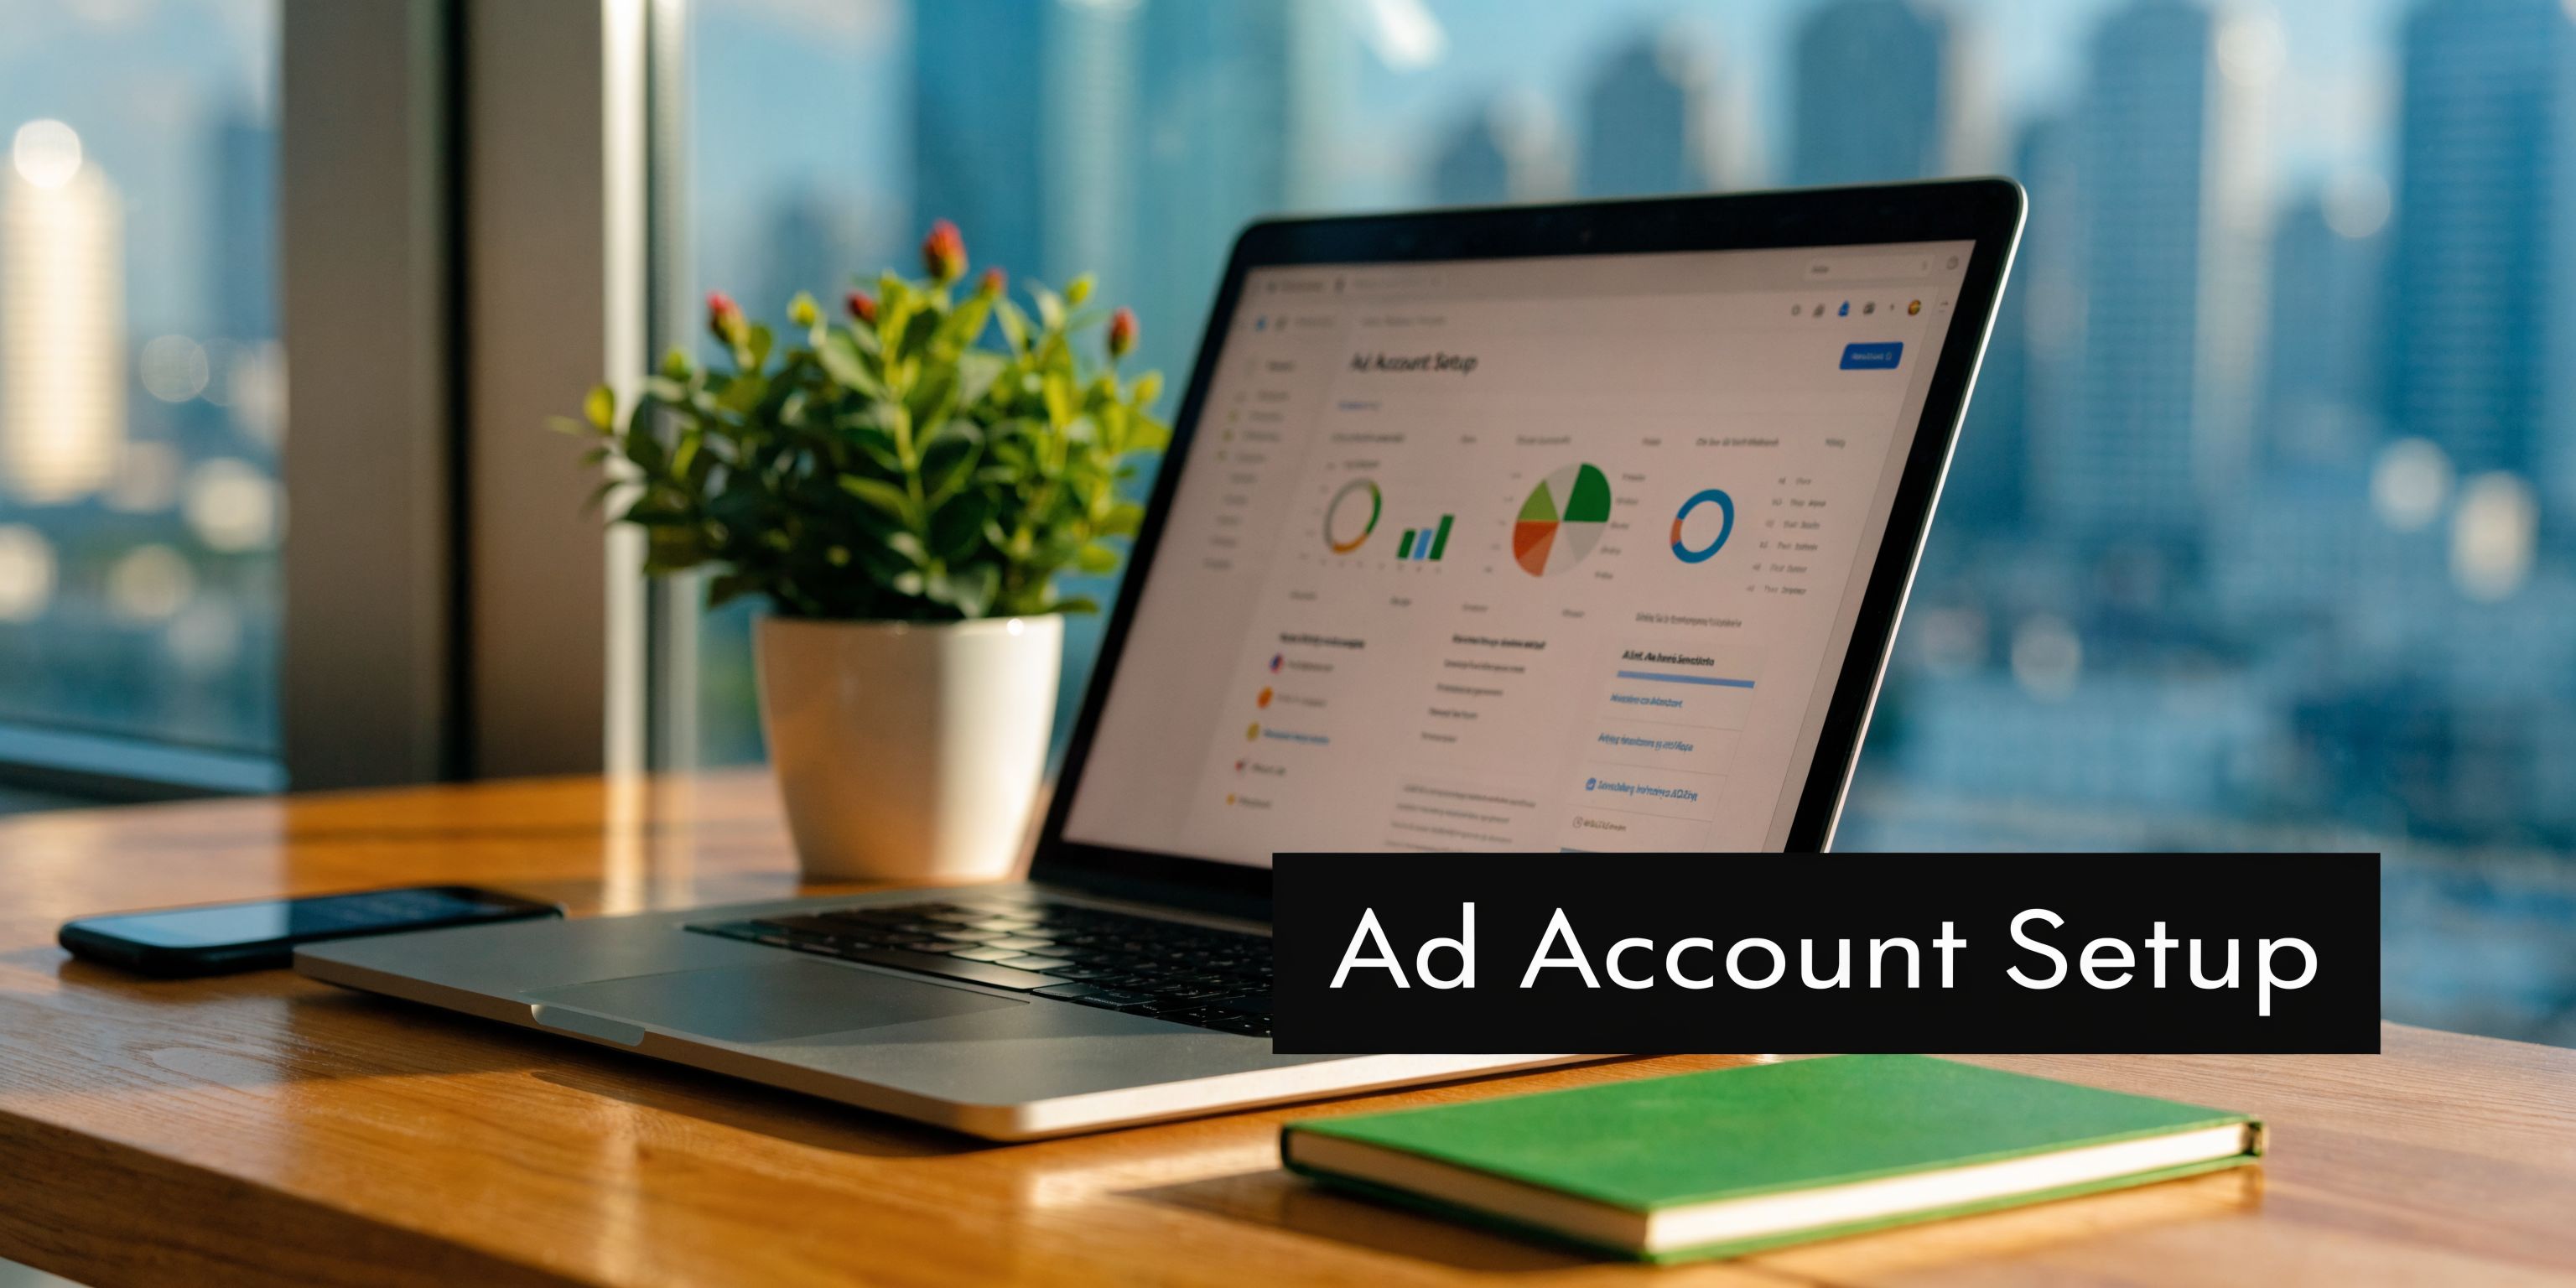
The temptation to just hit "Boost Post" is strong, but trust me, that's not where the real results are. To advertise professionally on Meta's platforms, you need to work from the Meta Business Manager (often called Business Suite).
Think of it as the central hub for all your brand's assets. It keeps your business activities—like your ad account, Facebook Page, Instagram profile, and tracking data—neatly organized and completely separate from your personal Facebook profile.
Create Your Business and Ad Account
Getting started is pretty straightforward. Head over to business.facebook.com/overview and create your Business Manager account. You'll just need to plug in your business name, your name, and a work email.
Once you're in, your first two moves are critical:
Connect Your Facebook Page: This is the brand page you'll be running ads from.
Create a new Ad Account: This is where your campaigns will run and where you'll manage your billing. If you've run ads before, you can also request access to an existing one.
After these steps, you'll land on a dashboard that will soon become your command center for launching and analyzing all your campaigns.
Get familiar with this view. It's where you'll manage every dollar you spend.
Install the Meta Pixel and Verify Your Domain
Now for the most important piece of the puzzle: the Meta Pixel. It’s a snippet of code you place on your website that acts as your eyes and ears. It tracks every significant action a user takes, from viewing a product to adding an item to their cart and, most importantly, making a purchase.
This data is gold. It allows you to see which ads are driving sales, build powerful retargeting audiences (like people who abandoned their cart), and feed Meta's algorithm the information it needs to find more people like your best customers.
Thankfully, you don't need to be a developer. Most e-commerce platforms like Shopify have simple, one-click integrations to get the Pixel installed.
While you're at it, you absolutely must verify your website domain with Meta. This is a non-negotiable step that proves you own your website and unlocks the ability to properly run and measure conversion campaigns. To get ahead of the curve, you should also look into setting up the Meta Conversions API (CAPI), which provides a more stable, server-to-server data connection that complements the Pixel.
My Two Cents: Seriously, don't skip domain verification. I've seen new advertisers get their accounts hamstrung because they ignored it. It’s a fundamental trust signal for Meta and is essential for tracking key e-commerce events.
The setup might seem a bit tedious, but it’s what gives you access to Meta's massive audience of over 3 billion monthly active users. The platform is more efficient than ever, with the average ad reaching 2,417 users for every $10 spent in 2025. With a global average cost-per-click (CPC) hovering around $0.43, it remains one of the most accessible and powerful channels for beginners. For a deeper dive into what you can expect to pay, Buffer has a great guide on Facebook ad costs and benchmarks.
Alright, the technical setup is behind you and your Meta Pixel is starting to gather data. Now for the fun part: moving from setup to strategy and actually building a campaign that gets results.
To get this right, you first need to wrap your head around Meta's three-tiered structure. Think of it as a simple hierarchy: Campaign, Ad Set, and Ad. Nailing this organization from the get-go is the key to maintaining control, making sense of your data, and optimizing effectively.
Building Your First High-Impact Campaign
At the very top of the pyramid is the Campaign, and its only job is to define your single, overarching business goal. This one choice tells Meta’s algorithm what you want and how it should bid to get it for you.

Honestly, don't overthink this. Just pick the objective that matches the real-world action you want someone to take. If you’re an e-commerce brand, you want sales. If you're running a service business, you need qualified inquiries. It's that simple.
Sales: This is your go-to if the goal is driving purchases on your site. The algorithm will actively hunt for users with a history of buying things online.
Leads: Choose this if you're collecting contact information, whether through an on-platform Instant Form or by sending people to a landing page to sign up.
You’ll see other objectives like 'Traffic' or 'Engagement', but for any serious performance team, these are mostly distractions. A 'Traffic' campaign will certainly get you cheap clicks, but they won't be from people who are likely to buy. In my experience, 95% of the time, 'Sales' or 'Leads' is the right answer.
Defining Your Audience and Placements
With your objective locked in, you’ll drop down to the Ad Set level. This is where the real magic happens—you decide who sees your ads and where they see them. Getting this part right is what separates an ad that disappears into the void from one that lands perfectly in front of your ideal customer.
For your first ad set, keep your audience strategy simple and focused. Don't try to boil the ocean by targeting everyone at once. Your goal is to get clean, clear feedback on what's working.
These are the core audience types we rely on every single day:
Custom Audiences: These are your lowest-hanging fruit—people who already know your brand. Start by creating audiences of all website visitors from the last 30 days and anyone who has added a product to their cart in the last 14 days. These are warm prospects, and retargeting them is often an easy win.
Lookalike Audiences: Once you’ve got some purchase data flowing, you can build Lookalike Audiences. You're essentially asking Meta to find new people who share the same characteristics as your best customers. A 1% Lookalike based on your purchasers is a fantastic starting point for customer acquisition.
Interest-Based Audiences: If you're starting from scratch with zero data, this is your play. Brainstorm the magazines your ideal customer would read, the other brands they follow, or their hobbies. Instead of using one broad interest, layering a few related ones (like "skincare" + "Sephora" + "Glossier") helps you create a much more qualified audience.
Next up are placements, which is just Meta-speak for where your ads show up across Facebook, Instagram, Messenger, and their partner network. My advice for beginners is simple: trust the machine. Use Advantage+ Placements (what used to be called Automatic Placements) and let Meta’s algorithm figure out where your ads will perform best for the lowest cost.
Pro Tip: Advantage+ is a great starting point, but don't set it and forget it. After a couple of weeks, dig into your placement breakdown report. You might discover that Instagram Reels is driving a CPA that's half the cost of Facebook Feed. You can use that insight later to build manual placement campaigns that laser-focus your budget on only the top-performing spots.
Structuring Your Ads
We've finally arrived at the Ad level. This is what people actually see—the images, videos, and words that do the selling. Your goal here is to test, test, and test some more. Inside every ad set, you should be running at least 3-5 different ad creatives.
This isn't optional. I've seen campaigns where one ad is a total dud while another becomes a runaway success. You simply won't know which is which unless you test them against each other. For a brand new campaign, I always recommend starting with a healthy mix of formats:
A sharp, high-quality single image.
A short, snappy video (think 15-30 seconds).
A carousel ad that can show off multiple products or walk through several benefits.
Structuring your campaigns this way (Objective > Audience/Placement > Creative) gives you a logical framework that's easy to manage, analyze, and eventually, scale. This disciplined approach keeps you from making random, chaotic changes and gives you a clear plan to navigate the initial volatility of the Facebook ads learning phase.
Your Creative: The Make-or-Break Element of Every Ad
You can nail your targeting, perfect your budget, and set up flawless tracking, but none of it matters if your ads look terrible. In the fast-scrolling world of social media, your creative is what earns you that split-second of attention. Great creative stops the scroll, sparks a connection, and convinces someone to take the next step.
A common myth I hear all the time is that you need a Hollywood-level production budget to compete. That’s just not true. More often than not, authenticity and a crystal-clear message will blow a slick, overproduced ad out of the water. Your goal should be to create something that feels like it belongs in the feed, not an ad that screams for attention.

Choose Your Format Wisely
Before you even think about design or copy, you have to pick the right ad format. Each one has its own unique strengths, and the best advertisers know how to match the format to the message. Don't just fall back on a single image because it’s the path of least resistance.
Here’s a quick rundown of the main formats and how we use them on a daily basis:
Single Image: This is your go-to for making a bold, simple statement. Use a high-quality, can't-look-away photo of your product in a real-world setting or a clean graphic with a powerful headline. It’s perfect for driving awareness or pushing a single, straightforward offer.
Carousel: Think of this as your digital flipbook. It's incredibly versatile for showcasing multiple products, highlighting different features of one item, or even walking a customer through a quick how-to guide. For e-commerce brands with a varied catalog, carousels are a must.
Video: Video is the undisputed king of engagement, especially on placements like Instagram Reels and Stories. A punchy 15-30 second video can show off your product’s value in a way a static image just can't. Think quick tutorials, before-and-after shots, or authentic user-generated content (UGC).
To get a better sense of where your efforts might pay off the most, it helps to know the performance benchmarks for different ad placements.
Facebook Ad Placement Performance Benchmarks (2026)
This table compares average Click-Through Rates (CTR) and Cost Per Mille (CPM) across different Facebook and Instagram ad placements to help you prioritize your creative efforts and budget.
Ad Placement | Average CTR | Average CPM |
|---|---|---|
Facebook Feed | 1.10% | $14.50 |
Instagram Feed | 0.88% | $16.75 |
Instagram Stories & Reels | 0.75% | $12.20 |
Facebook Video Feed | 1.35% | $11.80 |
Audience Network | 0.65% | $8.40 |
As you can see, video placements often deliver strong engagement without the higher costs of feed placements, reinforcing the importance of having a solid video strategy in 2026.
Writing Copy That Actually Sells
With your visual ready to go, the copy is what seals the deal. It gives context, hits on your customer's pain points, and gives them a clear next step. Nothing kills a great ad faster than vague, uninspired copy.
We often lean on the classic AIDA model because it just works: Attention, Interest, Desire, Action.
Headline (Attention): Your headline has one job: stop the scroll. Ask a provocative question, lead with a powerful benefit, or call out your target customer directly (e.g., "Calling all coffee lovers...").
Body Copy (Interest & Desire): This is where you build the connection. Speak your customer's language, show you understand their problem, and position your product as the only logical solution. Paint a vivid picture of how much better their life will be after they have your product.
Call-to-Action (Action): Don't be clever, be clear. "Shop Now," "Learn More," and "Sign Up Today" leave zero doubt about what you want them to do.
Pro Tip: Your ad copy doubles as a targeting filter. When you speak directly to your ideal customer's problems, you naturally attract qualified buyers and repel people who aren't a good fit. This simple shift makes your ad spend far more efficient. You can dive deeper into this and learn how to improve your click-through rate by perfectly aligning your message with your audience.
A Simple Framework for A/B Testing Your Creative
Never, ever assume you know which ad will be the winner. The only way to know for sure is to test. But don't get bogged down in overly complex testing strategies right out of the gate.
Start by testing just one variable at a time. For example, you could launch a test with three ads that are completely identical except for the main visual.
Ad 1: A clean, professional product shot on a white background.
Ad 2: A lifestyle photo showing a person happily using the product.
Ad 3: A short, authentic-looking video review (UGC-style).
Let the test run until you have statistically significant data—we aim for at least 50 conversions per ad set. Whichever visual gets you the best Cost per Acquisition (CPA) is your new "control" creative. From there, you can start a new test, keeping that winning visual but swapping out different headlines to see if you can beat it. This simple, iterative process is how you build a foundation of high-performing ads based on real data, not just a gut feeling.
Managing Your Budget and Measuring What Matters
You’ve hit "Publish" on your first Facebook ad. That’s a great first step, but now the real work starts. This is where you shift from building campaigns to analyzing them, and frankly, it's where most brands either make or lose money.
The secret to scaling isn't just getting lucky with one ad. It's about building a system for managing your budget and understanding your data. You have to make decisions based on numbers, not gut feelings—a trap that can burn through your budget faster than you can say "ad fatigue."
First up, you have to decide how you want to spend your money. Facebook gives you two main options: a daily budget or a lifetime budget. A daily budget tells Meta, "Spend up to this much each day." It's perfect for ongoing campaigns because it keeps your spending predictable and makes it easy to scale up or down.
A lifetime budget is different. You tell Meta, "Here's the total I want to spend for the entire run of the campaign." This gives the algorithm way more freedom. It might spend more on a Saturday when your audience is glued to their phones and less on a slow Tuesday morning.
Mastering Your Budgeting Strategy
Beyond just daily vs. lifetime, the bigger strategic choice is where you set that budget. You can set it at the ad set level, which gives you tight control over how much you spend on each audience. Or, you can use Advantage Campaign Budget (CBO) to set a single, unified budget for the entire campaign.
With CBO, you're essentially letting Meta’s algorithm manage the pot of money. It will automatically push more budget to the best-performing ad sets in real time.
Our Takeaway: For anyone starting out, we almost always recommend using Advantage Campaign Budget (CBO). It takes a ton of the manual work off your plate. If one of your audiences starts delivering conversions for cheaper, CBO automatically sends more money its way. You get better results without having to constantly check in and shift budgets around yourself.
Decoding Your Most Important Metrics
Once your ads are running, you’ll be staring at the Ads Manager dashboard. It’s a sea of data, but don’t panic. You only need to obsess over a few key performance indicators (KPIs) to know if you're on the right track. It's easy to get lost in vanity metrics like reach or impressions, but you need to focus on the numbers that actually move the needle.
Before you even launch, you have to know what success looks like for you. While about 27% of advertisers use conversion campaigns to go straight for the sale, others have different goals. The data shows a pretty even split, with 24.19% of ads aiming for post engagement and 22.64% for link clicks. This just proves you have to match your KPIs to your campaign objective, whether it's app downloads or new leads. For a deeper dive into platform stats, you can explore detailed benchmarks on Facebook ad performance.
Here are the three essential metrics our team lives by every single day:
Cost per Acquisition (CPA): This is your north star for efficiency. It's the exact cost you're paying for a single purchase, lead, or whatever action you're optimizing for. The goal is simple: keep your CPA below your target.
Return on Ad Spend (ROAS): This is your profitability metric, plain and simple. It shows the total revenue you've earned for every dollar spent on ads. A 3x ROAS means for every $1 you put in, you got $3 back.
Click-Through Rate (CTR): This tells you how compelling your ad is. It's the percentage of people who saw your ad and actually clicked. A low CTR (anything under 1% is a red flag) usually means your creative isn't resonating or your targeting is off.
Checking these three metrics every morning is the fastest way to diagnose your campaigns. A high CPA might be driven by a low CTR, which tells you it’s time to test new creative. A low ROAS even with a decent CPA could mean you need to find ways to increase your average order value. This simple, data-driven routine is the foundation of effective advertising.
Your First 30 Days: An Actionable Playbook
Getting your first campaign live is a huge milestone, but it's really just the starting line. That first month is a chaotic but critical learning period. How you handle the volatility will absolutely set the stage for your long-term success. So many new advertisers panic when results don't pour in on day one, and they start making knee-jerk changes that completely sabotage the algorithm.
This is our battle-tested plan for those first 30 days. It’s designed to give you a solid routine, keep you focused on what actually matters, and help you move from launch to optimization with confidence.
Week 1: Launch and Technical Check-Up
Your job in the first week is incredibly simple: launch the campaign and then keep your hands off. Seriously. Your only task is to make sure the technical plumbing is working correctly. Is the campaign actually spending its budget? Is your Meta Pixel firing on all the key pages and conversion events?
Resist the urge to judge performance. The data you see in the first few days is almost pure noise. The algorithm is just starting to learn, and those early metrics are in no way predictive of how things will look in a few weeks.
Here’s what your daily check-in should look like:
Spend and Delivery: Confirm the campaign is active and spending money. If it's not, you'll want to check for billing problems or ad disapprovals.
Pixel Health: Pop open the Meta Pixel Helper browser extension and click through your key website pages to verify the pixel is active.
Conversion Tracking: If a test purchase comes through, make sure it shows up in Ads Manager. Don't worry about the cost for now; just confirm the connection is solid.
Week 2: The Art of Doing Nothing
Okay, now for the hardest part. For most new advertisers, week two is a true test of patience because your main task is to do nothing. Your campaign is deep in the learning phase, where Meta's system needs roughly 50 conversions per ad set to find its rhythm. Every time you make a big change—fiddling with the budget, targeting, or creative—you reset that process and drag out the volatility.
Performance will be all over the map. You might have one amazing day followed by a terrible one. This is completely normal. Your job is to let the system gather enough data to find its footing. If you're struggling to get enough conversions to exit the learning phase, your budget might be a bit too low for your target CPA.
Key Insight: Think of the learning phase as Meta’s algorithm trying to find the most efficient route on a map. Every time you make a major edit, you're telling it to go back to the starting point and try again. Trust the process and let it run.
Week 3: Your First Real Optimizations
By now, you should finally have enough data to make your first intelligent moves. You're no longer guessing; you're analyzing. The key is to look at your campaign's performance over the entire run, not just what happened in the last 24 hours.
Your primary focus should be at the ad level. It's time to find the clear losers and turn them off. An ad is probably a loser if it has:
Spent a good chunk of budget without a single conversion.
A Cost per Acquisition (CPA) that is 2-3x higher than your other ads.
A very low Click-Through Rate (CTR) compared to its peers, which tells you the creative just isn't resonating.
When you turn off these underperformers, you automatically force the budget toward the ads that are working. This is your first, and most powerful, optimization.
This visual timeline breaks down how you should be thinking about budget management and measurement as your campaigns mature.
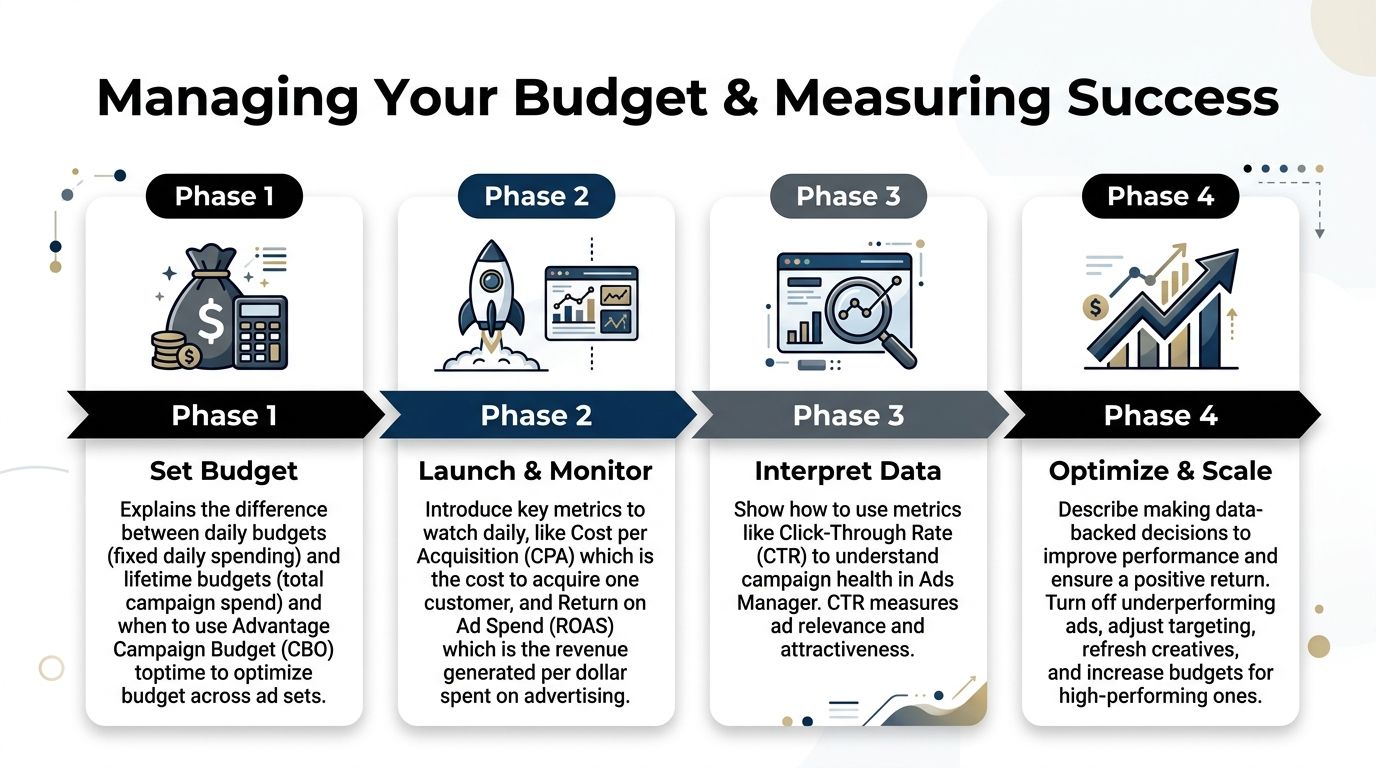
As the infographic shows, it’s a clear progression. You set the foundation, gather data, optimize based on that data, and then scale what works. Each stage builds on the last.
Week 4: Analyze and Plan Your Next Move
In the final week of your first month, you'll shift from reactive optimization to proactive, strategic planning. With a full 3-4 weeks of data, you can finally spot real trends and figure out what to do next.
Take a hard look at your winning ads. What do they have in common? Is it a specific headline angle? A certain style of video? A particular customer testimonial? These common threads are pure gold—they form the hypothesis for your next round of creative testing.
This is also where you can start thinking about scaling. If an ad set is performing beautifully with a stable CPA, you can begin to slowly increase its budget. A good rule of thumb is no more than 20% every 2-3 days. This controlled approach lets you increase volume without shocking the system and resetting the learning phase.
Your first 30 days are in the books. You survived! More importantly, you now have a data-backed foundation to build on for months and years to come.
Common Questions When Starting Facebook Ads
Alright, even with the best game plan, you're going to hit a few snags. That's just part of the process when you're getting started with Facebook ads. I've heard these same questions pop up time and again from teams just like yours, so let's tackle them head-on.
How Much Should I Spend When I Start?
This is always the first question, and there's no single magic number. However, a good rule of thumb for your very first campaign is to set a budget of $20-$50 per day.
This isn't an arbitrary range. It's designed to be just enough to feed Meta's algorithm the data it needs to find its footing and exit the dreaded "learning phase" without you having to wait weeks.
Your goal is to spend enough to get meaningful feedback—think 25-50 conversions per week—but not so much that you’re burning through cash on something that isn't proven yet.
Why Are My Ads Not Delivering?
Seeing your ad get approved and then sit there with zero impressions is maddening. You've done all the work, and then... crickets. This happens more often than you'd think, and it usually comes down to a few usual suspects.
Your audience is too small: If you've layered on tons of interests and exclusions, Meta might not be able to find enough people to serve the ad to.
Your bid is too low: This is only an issue with manual bidding, but if you've set your own cap, you might simply be getting outbid by everyone else.
Your creative isn't hitting the mark: Meta's system can sometimes deprioritize ads it deems low-quality or irrelevant, effectively putting them at the back of the line.
My first move is always to check the audience size. If it's tiny, try broadening it a bit. If that's not the issue, switch to an automatic bidding strategy and let the algorithm do the work. Still no luck? It's time to go back to the drawing board with fresh creative and copy.
How Long Does the Learning Phase Last?
Ah, the learning phase. This is the initial period where Meta's algorithm is figuring out who best to show your ads to. Performance can be all over the place—one day you’ll feel like a genius, the next you'll question everything.
Officially, the learning phase ends once an ad set gets about 50 optimization events (like purchases, adds to cart, or lead form fills) within a 7-day window.
The most important thing to remember is this: don't touch it. Making significant edits to your ad set—changing the budget, creative, or targeting—can completely reset the learning process. Just let it run, even if it feels a little rocky at first. Patience here really does pay off.